Install eSIM on iOS
Direct Installation
QR Code
Manual Installation
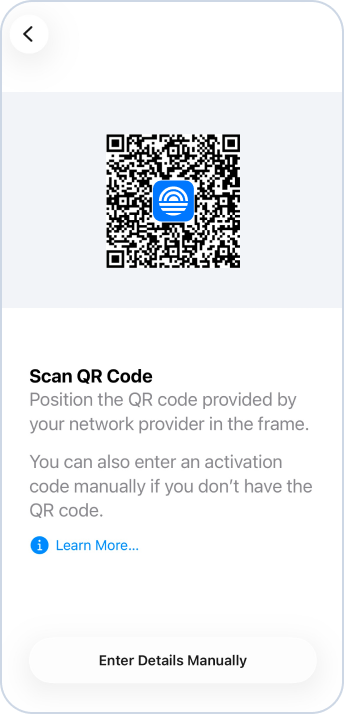
Step 1
Scan your unique QR code

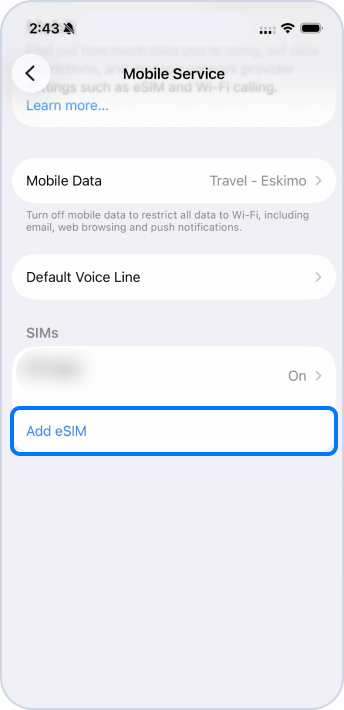
Step 2
Install Eskimo eSIM
- Ensure you’re connected to a stable Wi-Fi.
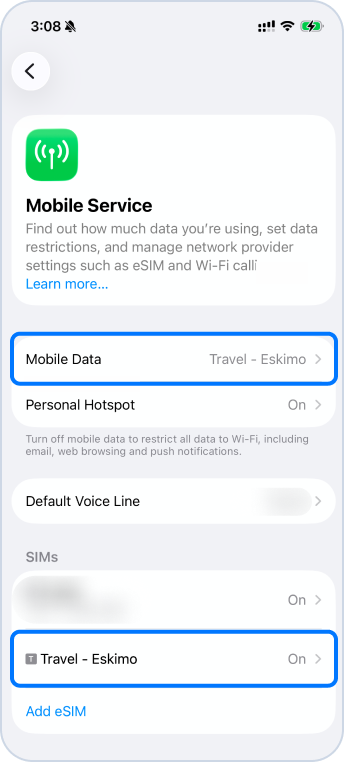
- Go to your iPhone Settings → Mobile Service
- Select ‘Add eSIM’
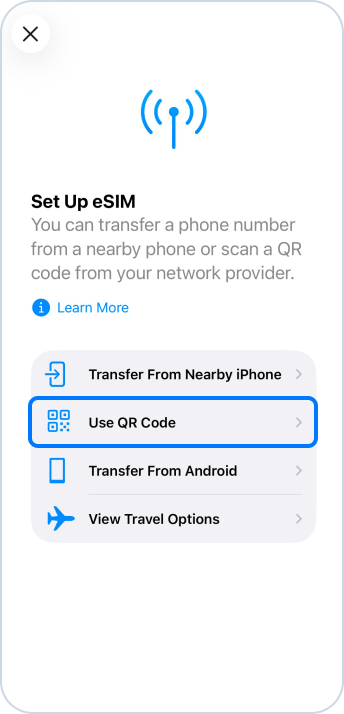

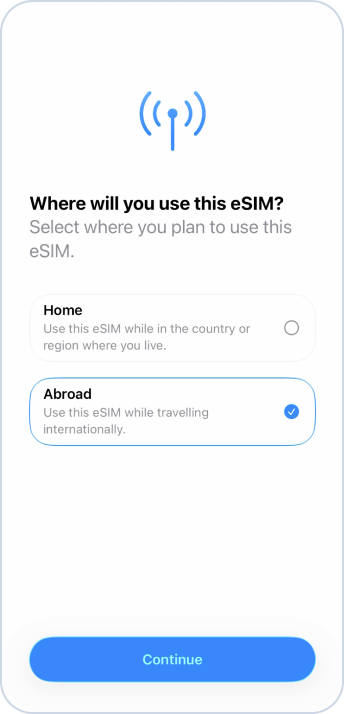
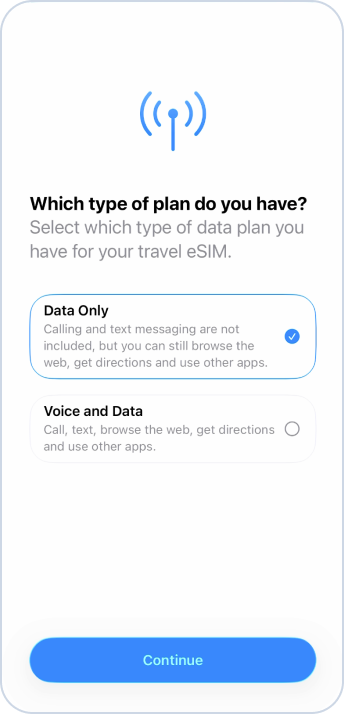
Step 3
Set up your eSIM
Select ‘Abroad’ → ‘Data Only’'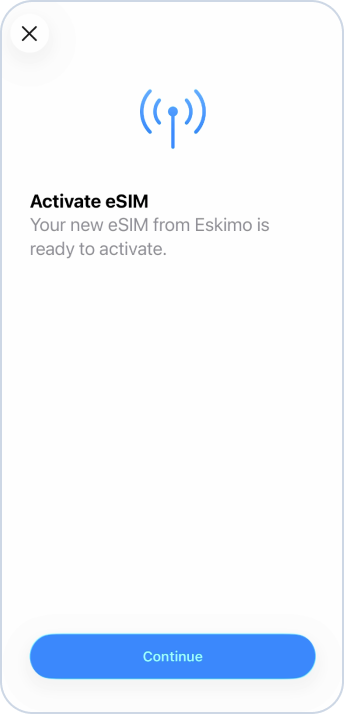
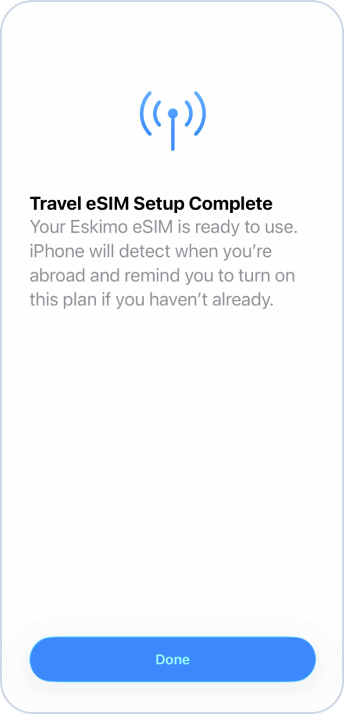
Step 4
Stay connected while you travel
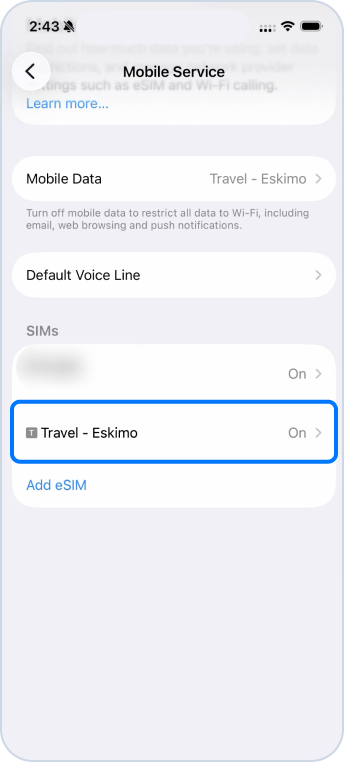
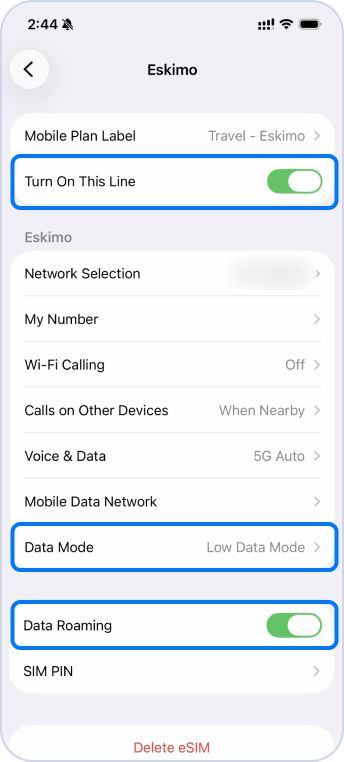
- When you’re ready to connect, go to your iPhone Settings → Mobile Service
- At the SIMs section, select Eskimo → ‘Turn On This Line’ and enable ‘Data Roaming’
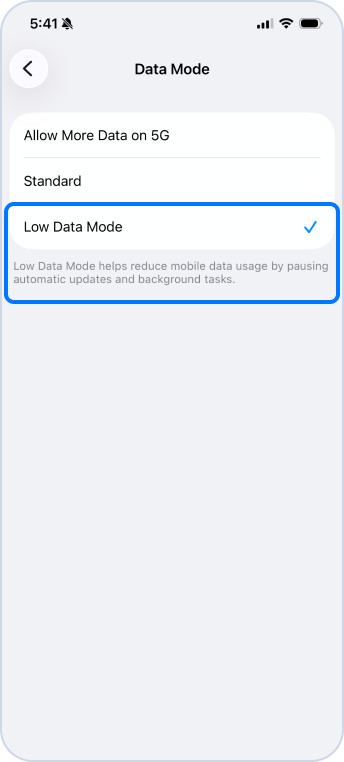
- Ensure ‘Low Data Mode’ is selected to pause automatic updates and background tasks.
Step 5
Final step
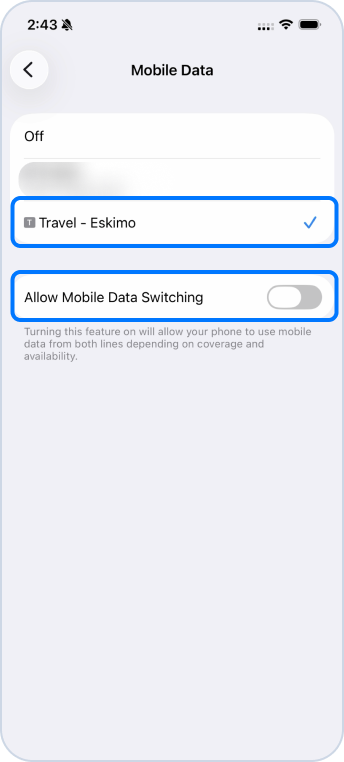
- For Mobile Data, select ‘Eskimo’
- Ensure ‘Allow Mobile Data Switching’ is off.
- Remember to disable Data Roaming on your primary data plan.
- All set! Your Eskimo eSIM is ready.
Reminder
Eskimo eSIM does not expire. Do not delete it from your device. Replacement eSIM will only be issued when you purchase a new data plan.
To avoid accidental roaming charges: Settings → Mobile Service → Select your Primary SIM → Disable Data Roaming.
Still can’t connect?
It may sometimes take up to 5 minutes to connect to a new destination network for the first time. If that happens, try:
- Confirm your final settings are correct
- Switch ON airplane mode for 10 seconds
- Switch OFF your Airplane mode and Wi-Fi
- Reboot your device
- Need help? Contact us via our 24/7 live chat.